I'm still on a knitting kick. And I made this adorable cowl/hood for Angel Baby. It's not quite as good as the picture. But it's not too shabby for my first time.
I need to work on the hood seaming and make the ears bigger next time. But other than that, it's adorable!!!
I'm going to make one for me (without ears) in blue and one for Squeaker (with ears) in a chocolate brown.
I did finish my cranberry cowl. But I need to block it and sew the button on. I will post that pic when I'm all done.
Showing posts with label Crafts. Show all posts
Friday, October 4, 2013
Friday, September 20, 2013
Weekly Obsession: Knitting
My mother is a textile crafter. She has branched out to paper, but she loves: Cross Stitch, Crochet, knitting, you get the picture.
Well, she has been trying to get me to cross stitch and crochet my entire life. To little to no avail. I picked up the cross stitch bug a few years ago. But I just don't really like to crochet. It's just......ugh. I don't like having to figure out where the stitches are, where to put the hook, ugh. Too much thinking involved.
But when I was pregnant with Squeaker, I asked for something I could do that was mindless, well more meditative than mindless. So she suggested knitting. I had always thought knitting would be twice as difficult as crochet, one more needle after all. But it turns out all the issues I had with crochet, were taken care of with knitting. I don't have to figure out where to put the stitch, they are all on the needles.
I'm really excited to be working on this project. It's a really cute cowl and I'm doing it in a really pretty cranberry color.
AND, Mom and I are going to be doing a Mystery Knit Along in October through the Craftsy site. Should be a lot of fun. I'm really excited.
Also, if any of you are into yarn crafts, Craftsy is having a huge "2 Million Member" sale. Some of their yarn is 75% off. Most are closer to 65% but COME ON!!! HUGE!!!!
But the best thing ever is when I texted this picture to my mom, she said, "Very pretty! It looks like you've been knitting for years."
Awwwwww, thanks Mom!
Well, she has been trying to get me to cross stitch and crochet my entire life. To little to no avail. I picked up the cross stitch bug a few years ago. But I just don't really like to crochet. It's just......ugh. I don't like having to figure out where the stitches are, where to put the hook, ugh. Too much thinking involved.
But when I was pregnant with Squeaker, I asked for something I could do that was mindless, well more meditative than mindless. So she suggested knitting. I had always thought knitting would be twice as difficult as crochet, one more needle after all. But it turns out all the issues I had with crochet, were taken care of with knitting. I don't have to figure out where to put the stitch, they are all on the needles.
I'm really excited to be working on this project. It's a really cute cowl and I'm doing it in a really pretty cranberry color.
AND, Mom and I are going to be doing a Mystery Knit Along in October through the Craftsy site. Should be a lot of fun. I'm really excited.
Also, if any of you are into yarn crafts, Craftsy is having a huge "2 Million Member" sale. Some of their yarn is 75% off. Most are closer to 65% but COME ON!!! HUGE!!!!
But the best thing ever is when I texted this picture to my mom, she said, "Very pretty! It looks like you've been knitting for years."
Awwwwww, thanks Mom!
Friday, August 23, 2013
Weekly Obsession: Cross Stitch
I have been on a cross stitch kick lately. Just something about sitting and crafting has really taken hold of me lately.
Some of you may remember that cross stitch project I posted about a little over a year and a half ago.
Well, I was picking at it and realized that while I'm further along, as you can see below.
However, with 30 some odd different colors and only needing a stitch here, or two there, it can be a bit tedious. So I've branched out and started a few other projects. Both of which are gifts, so I can't post them now. ;)
How about you? Are you a cross stitcher? What are you working on? Do you do any other crafts?
Some of you may remember that cross stitch project I posted about a little over a year and a half ago.
Well, I was picking at it and realized that while I'm further along, as you can see below.
However, with 30 some odd different colors and only needing a stitch here, or two there, it can be a bit tedious. So I've branched out and started a few other projects. Both of which are gifts, so I can't post them now. ;)
How about you? Are you a cross stitcher? What are you working on? Do you do any other crafts?
Thursday, February 2, 2012
New Craft Project - Cross Stitch Wheel of the Year
First things first.
Happy Imbolc everyone!
I started this project in November. I would be a lot further along if it weren't for three things.
1. Yule.
2. Christmas.
2. Christmas.
3. The crappy lighting in our living room at home. And since it's dark outside by the time I get home, I can really only work on it on the weekends during the afternoon. That is if we haven't already booked ourselves silly on those days.
It's difficult to tell what it is I know. but it will be a Wheel of the Year. I've got the center part finished and the other part is part of a spoke that would pointing to SE if it were a compass. Anyway, if you want to see a small pic of the completed project go here. If you "look inside" it's the pillow on the top right of the copyright page. I'm not doing a pillow. I'm making it into a framed piece. But if you're into cross-stitch and fantasy/pagan theme projects, would recommend it. I really like the book, it's got a lot of fun ideas.
Oh, and the black dotted lines are just to help me tell where all the stitches are. I prepped my fabric by finding the center. Then I decided to to lines for every 10th stitch. It's really helped me a lot in figuring out where to put the next stitch. And when I'm done, I'll pull my guide lines out. The only thing to keep in mind if you decide to do this little trick, when you are working near a guide thread, don't split the thread and put a stitch through it. Otherwise, you'll never get the guide line out.
Labels:
Crafts,
Seasons,
Spiritual Path,
Wheel of the Year
Thursday, October 28, 2010
New Bracelets, Pagan Music and Aprons
I've been so busy crafting lately. In fact, I finished my peacock braclet and another one called "Flame". I have a photo of it here. I took it on my phone, so it's not the best photo ever.
I'm getting ready to start on my third loom bracelet and getting new ideas all the time. I just love it when my Creativity is working overtime! In fact, my Mom and I are going to open an Etsy store soon. We have the store name and everything, just have to make stuff to sell. ;)
Here's a Giveaway at Witchy Gumbo. She's giving away this awesome "Domestic Goddess" apron to one of her lucky followers. Check it out here.

Just an FYI - Leathra over at Confessions of a Crafty Witch has a review up about the pagan musician S.J. Tucker, and she's hosting a giveaway for S.J.'s latest cd! Check it out on her site! I had never heard of S.J. Tucker, but she's an awesome musician. She's got 6 or 7 cd's. And her Blessings cd is all pagan music. Great songs. Especially her Come to the Labyrinth. I love these lines at the end.
"When all our sorrows cauldron into one,
be reborn, this Samhain night"
Perfect for this time of year too. ;)

Feel free to check out the giveaways, but don't hope for much. ;) I'm planning on winning them both. Just so ya know. Hee hee.
I'm getting ready to start on my third loom bracelet and getting new ideas all the time. I just love it when my Creativity is working overtime! In fact, my Mom and I are going to open an Etsy store soon. We have the store name and everything, just have to make stuff to sell. ;)Here's a Giveaway at Witchy Gumbo. She's giving away this awesome "Domestic Goddess" apron to one of her lucky followers. Check it out here.
Just an FYI - Leathra over at Confessions of a Crafty Witch has a review up about the pagan musician S.J. Tucker, and she's hosting a giveaway for S.J.'s latest cd! Check it out on her site! I had never heard of S.J. Tucker, but she's an awesome musician. She's got 6 or 7 cd's. And her Blessings cd is all pagan music. Great songs. Especially her Come to the Labyrinth. I love these lines at the end.
"When all our sorrows cauldron into one,
be reborn, this Samhain night"
Perfect for this time of year too. ;)

Feel free to check out the giveaways, but don't hope for much. ;) I'm planning on winning them both. Just so ya know. Hee hee.
Tuesday, October 19, 2010
Surprise Blogger Swap
Okay ya'll, so I decided to join in this fun Surprise Blogger Swap that Jamie over at This is Me; Consequently. decided to host. And last week I received my wonderful surprise package from Lisa at A Southern Belle Misplaced in Michigan. And she sent me such cool stuff.

As you can see, I got a journal, notecards, two candles, a raven figurine and a fun little Blessed Be pillow (which is now hanging on the knob of my china cabinet).
The raven is the centerpiece on my table and I'm looking forward to lighting the candles which smell all wonderful and Autumn-y.
I've been up to a whole host of things lately. I had the week off last week since the Hubs is out of town for work. Which has really sucked ass. I miss him so much, as does the Little One.
But while I was off, not only did I visit a bunch of people, I also took this awesome bead class. I don't know how many of you bead with a loom, but this lady I took the class from had an awesome idea and invented her own loom which has less work overall. Anywho, here's the first part of the project. Well, I'm finished with all the beading. Now, I have to wait for the next class to figure out how to finish the bracelet. But here's my hard work in all it's glory!

I can't wait to finish it so I can
1. wear it.
2. start another one.

As you can see, I got a journal, notecards, two candles, a raven figurine and a fun little Blessed Be pillow (which is now hanging on the knob of my china cabinet).
The raven is the centerpiece on my table and I'm looking forward to lighting the candles which smell all wonderful and Autumn-y.
I've been up to a whole host of things lately. I had the week off last week since the Hubs is out of town for work. Which has really sucked ass. I miss him so much, as does the Little One.
But while I was off, not only did I visit a bunch of people, I also took this awesome bead class. I don't know how many of you bead with a loom, but this lady I took the class from had an awesome idea and invented her own loom which has less work overall. Anywho, here's the first part of the project. Well, I'm finished with all the beading. Now, I have to wait for the next class to figure out how to finish the bracelet. But here's my hard work in all it's glory!

I can't wait to finish it so I can
1. wear it.
2. start another one.
Monday, October 4, 2010
Things that Make me Smile
To lift my spirits up I've been doing the following lately.
Playing with the Wee One. Her laugh definitely lights up my day!
Snuggling with the Hubs on the couch.
Making jewlery. (Specifically using sead beads.)
Making my Halloween Costume. Part of it looks like this but sparkly. I had glitter everywhere!

Getting back into daily oracle/tarot readings.
What are you up to?
Thursday, May 13, 2010
Great Ideas on a Small Budget
I've been trying to make more and more things at home instead of buying.
Examples:
1)I made bread and cookies with my awesome Sis-in-Law a few weeks ago. Man, nothing like fresh bread. In fact, I don't remember bread being eaten so fast in my house before.
2)I'm making some potions/waters rather than spending a butt-load of money for it. (Butt-load, such a strange turn of phrase.)
3)I made a quick batch of Arnica Salve for my aforementioned Sis-in-Law who unfortunately twisted her ankle really bad while helping a drunk friend.
Arnica Salve
Dried Arnica flowers
Oil (I've used Olive and Avocado before. The main thing is you want something good for the skin. No canola or vegetable oil here.)
Essential oil for scent. I used a little lemon essential oil this time, though I've also used lavender too. Whatever works and seems as though it'd help.
1) Place Arnica flowers in a small crock pot or pan. (I have a "Little Dipper" crock pot that I always use just for potions/salves/etc.
2) Steep the Arnica flowers in just enough oil to cover. You can steep for as long as you want, but the minimum should be at least two hours.
3) Strain flowers out of oil.
4) Pour oil back into pot. Add essential oil (if necessary) and beeswax.
I've found that 2 parts oil to 1 part wax works well. But it depends on how smooshy/oily/hard you want your salve.
5) After wax melts, you can pour into a heat safe container. I find that 4oz glass jars work really well.

And this is another quick and easy tip that I plan on stealing.
Examples:
1)I made bread and cookies with my awesome Sis-in-Law a few weeks ago. Man, nothing like fresh bread. In fact, I don't remember bread being eaten so fast in my house before.
3)I made a quick batch of Arnica Salve for my aforementioned Sis-in-Law who unfortunately twisted her ankle really bad while helping a drunk friend.
Arnica Salve
Dried Arnica flowers
Oil (I've used Olive and Avocado before. The main thing is you want something good for the skin. No canola or vegetable oil here.)Essential oil for scent. I used a little lemon essential oil this time, though I've also used lavender too. Whatever works and seems as though it'd help.
1) Place Arnica flowers in a small crock pot or pan. (I have a "Little Dipper" crock pot that I always use just for potions/salves/etc.
2) Steep the Arnica flowers in just enough oil to cover. You can steep for as long as you want, but the minimum should be at least two hours.3) Strain flowers out of oil.
4) Pour oil back into pot. Add essential oil (if necessary) and beeswax.
I've found that 2 parts oil to 1 part wax works well. But it depends on how smooshy/oily/hard you want your salve.5) After wax melts, you can pour into a heat safe container. I find that 4oz glass jars work really well.

And this is another quick and easy tip that I plan on stealing.
Labels:
Crafts,
Family,
Recipes,
Sister-in-Law,
Spellwork
Thursday, December 10, 2009
Hand Bound Journal
Home 'Crafted Holidays part Deux
Today, you’ll see how I made my most recent journal. I made a Moleskine type journal before and that took forever. Glue, stacking, sewing, leather….man, just like
This type of journal didn’t take so long to put together. The majority of the time was spent prepping all the materials.
What you need:
Materials for Journal:
- Leather (I used a thicker piece of leather from Hobby Lobby.) The thicker the leather, the less likely you are to have torn holes.
- Paper (I used 50lb sketchbook paper. But you can use whatever weight or size you want.)
- Waxed linen thread. (You can find this at Hobby Lobby right next to the leather.)
- Leather strap (Again, found in the same vicinity at Hobby Lobby. I’d probably use a thinner leather next time. My strap was a bit stiff.)
Tools:
- Cutting mat
- Ruler
- Xacto or some sort of craft knife
- Folding bone or something to crease your paper with.
- Awl or sharp needle (needs to be heavy duty to pierce leather.)
- Sewing needle. (Upholstery ones would be nice since it’d be more heavy duty, but if you’ve already pierced through the paper and the leather, you can use a regular needle that’s big enough to thread the waxed thread through.
- Tailor’s chalk or some sort of pen that shows up on the leather.
- Scissors
- Pencil
Preparation:
Paper prep:
- Figure out how large you want your journal to be. I ended up with an 8x5 inch journal. So I cut down 9x12 inch paper and folded it in half. You need to fold in half for this journal because you’re sewing in the pages.
- Once you have your paper size chosen, figure out how many pages you want your journal to have. Remember each piece of paper equals 4 pages in the book.
- Then you’ll need to divide up your paper into “signatures” these are the sections of pages that you will sew into the journal. I used 6 pages per signature and had 6 signatures. (Note: You need to have an even number of signatures for sewing to come out right.
- Fold pages and crease with the bone folder or straight edge. Set aside all signatures.
- Mark holes for sewing with a pencil. You need 6 holes per signature if you’re doing 4 holes for the leather. (The two extra holes are to tie the signatures together.
- I marked my holes at ½, 1, 3, 5, 8, and 8.5 inches.
- Punch through paper with awl.
Leather prep:
- No you know the size of your journal. You’ll need to keep an extra half inch of leather all around your journal. (I didn’t do this and you can tell when you look at the journal.) So, for an 8x5 journal you’d need leather 9 inches high. For the length of the leather you need to figure out how many signatures you have in the book and if you want the leather to wrap around the front of the journal. If you go the same route I did, you’ll need to keep a half inch around the sides and include another inch for the spine. So this leather cover would be 9 x 12 inches.
- Take your ruler and mark off the center inch of the leather. You can mark the way I did, but you’ll have the mark on there after you’re finished. (I didn’t use tailor’s chalk, so I don’t know if that will brush off later.)
- Mark a half inch and an inch and a half from the center edge of the front cover. This is where the strap will attach to the leather. If you follow the center line through the length of the journal. Mark a line on each edge of the center margin. This is again, where the strap will cut through the leather. These marks need to be at least the width of your strap. (Since your strap will go through at these marks.)
- Cut through the leather with the xacto knife. BE CAREFUL! Leather can sometimes be difficult to cut through.
- For the binding holes: I placed my holes at 1, 3, 5 and 8 inches along the spine. You’ll need one set of lengthwise holes per signature.
- To measure widthwise for the holes, divide up the spine evenly among the signatures. You want to leave at least a little space for each to counter tearing. I marked mine about 3/8th of an inch apart.
- Punch through holes with awl or sharp implement.
- Leather strap. Mark a line lengthwise on the strap the same width as the strap about a half inch from the edge. This is where the leather strap will go through itself to secure to the journal.
Putting everything together.
- Take your first signature and thread the waxed thread through the top hole from the outside of the signature to the inside. Leave about a 3-4 inch length of thread to tie off the signatures at the end of sewing. Then pull the thread through the 1 inch hole and thread through the leather as well. Go up through the leather and signature at the 3 inch hole. Down through the 5 inch hole. Up through the 8 inch hole. And only go through the paper on the 8.5 inch hole.
- Take the second signature and you will start sewing this one through the bottom 8.5 inch hole. Down through the 8 inch hole. Up through the 5 inch hole, down through the 3 inch hole and up through the 1 inch hole. Again for the ½ inch hole only go through the paper.
- Continue adding signatures.
- On your last signature you will end at the top of the journal. (This is why you need an even number of signatures.)
- Go through the journal. Tighten the thread throughout. The nice thing about waxed thread is that it is pretty sticky to the leather and paper. So you won’t have a hard time keeping the thread taught.
- Once it’s all tightened, tie off the thread to itself.
- Thread the strap through. This was a little tricky for me to figure out.
- Lay the cut edge of the strap over the cover of the book. Keep the tail end of it to the right.
- Loop the strap over the edge of the journal and through the first slit on the edge of the book. Pull the strap through itself.
- Tuck the remaining edge of the strap (the part before the slit) under the second slit in the cover.
- Take the tail of the strap and pull it through the first slit in the binding.
- Thread the strap through the second hole.
- Wrap strap around journal and loop under itself on front.
YAY! You’re finished. See, not too difficult. It just takes a while to prep the materials.
Tuesday, December 1, 2009
Cranberry Orange Vodka
A big hearty hello to everyone from Domestic Witch's Home 'Crafted Holidays.
I got this recipe from the Food Network a few years ago. I've gotten rave reviews with this little beauty and it doesn't take much time at all.

Ingredients
1 pound fresh or frozen cranberries
1 cup sugar
2 teaspoons vanilla extract, or 1 vanilla bean, split
2 oranges, peels cut into 2-inch strips
1 (750-ml) bottle vodka
To serve:
1 bottle tonic water
Lime slices, for garnish
Directions
Place cranberries, sugar and vanilla in a medium saucepan. Place pan over medium heat and stir. Simmer cranberry mixture until the berries burst, about 5 to 6 minutes.

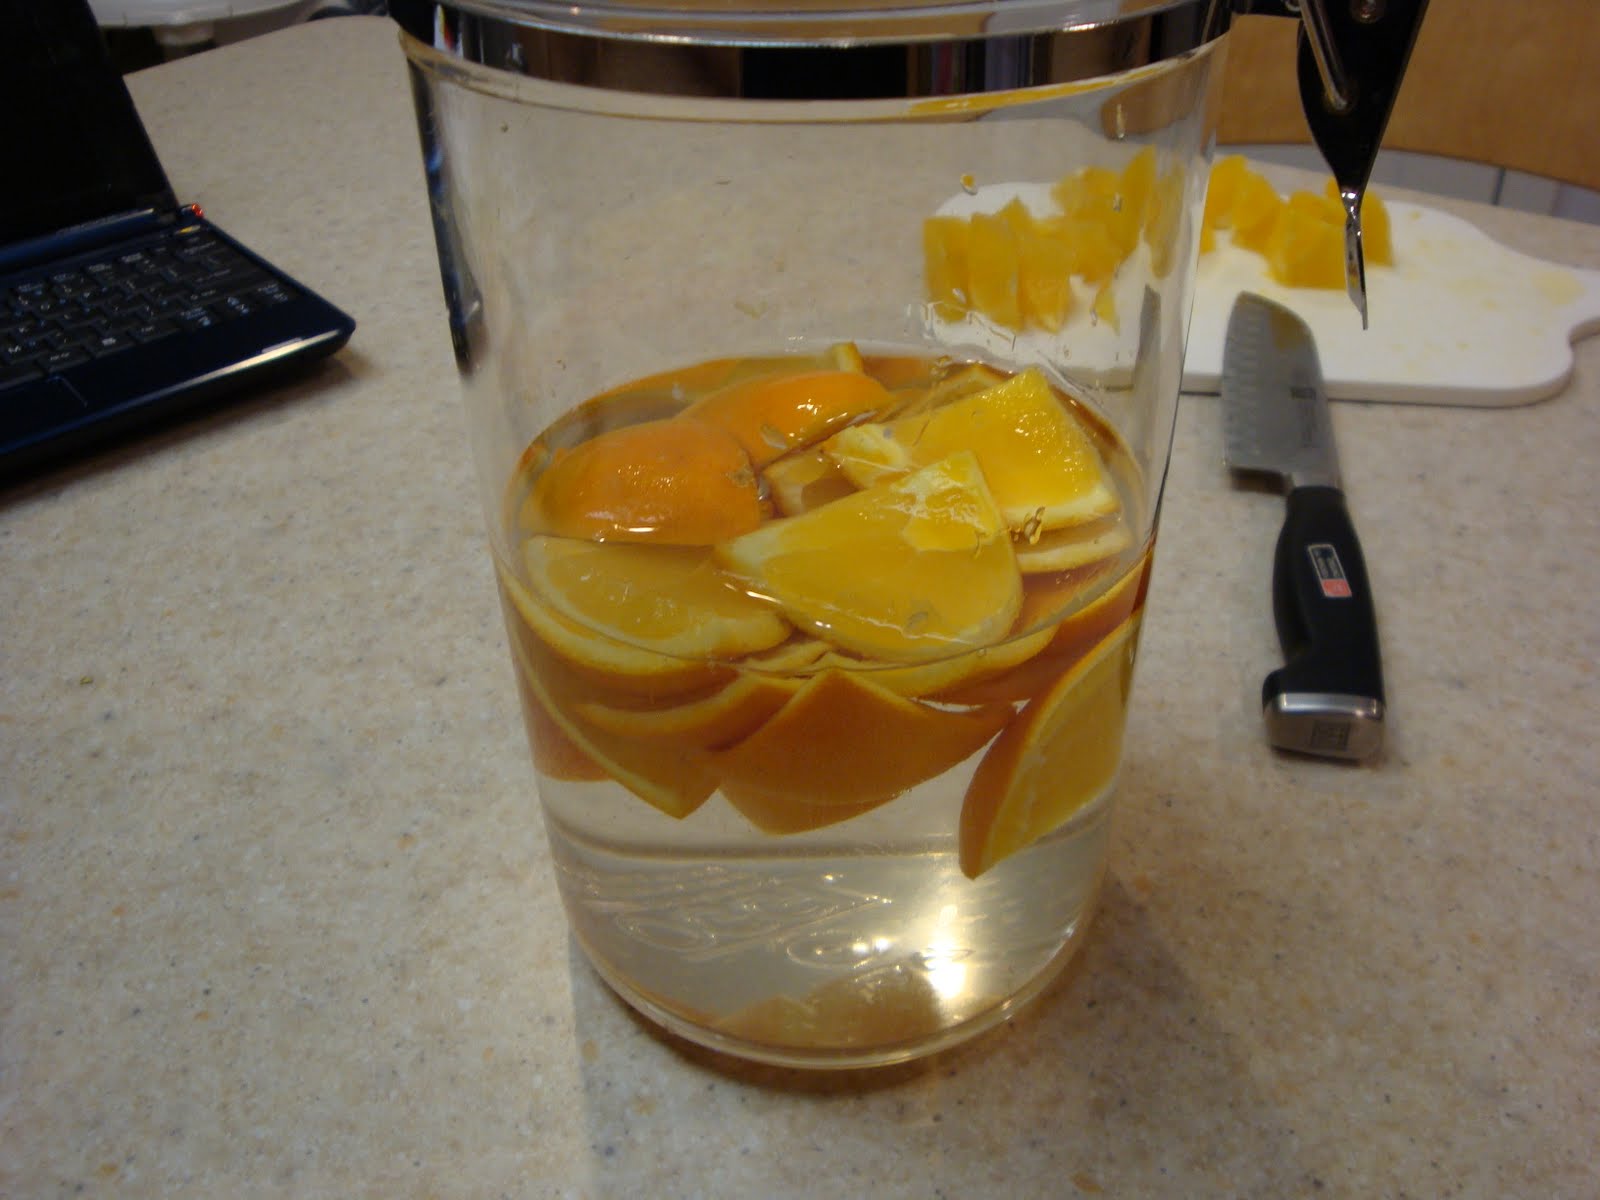
Place orange peels in a large glass container with an airtight lid, or large mason jars with lids. Pour vodka over the orange peels.

Allow the cranberry mixture to cool. Pour the cooled mixture into the glass container(s). Cover tightly and set aside for 1 week. After 1 week, strain out the cranberries sand orange peels and pour mixture into a clean bottle, using a funnel. Store vodka in the refrigerator.

Everything turns out all ruby red, and very festive for the holidays.
I got this recipe from the Food Network a few years ago. I've gotten rave reviews with this little beauty and it doesn't take much time at all.
Ingredients
1 pound fresh or frozen cranberries
1 cup sugar
2 teaspoons vanilla extract, or 1 vanilla bean, split
2 oranges, peels cut into 2-inch strips
1 (750-ml) bottle vodka
To serve:
1 bottle tonic water
Lime slices, for garnish
Directions
Place cranberries, sugar and vanilla in a medium saucepan. Place pan over medium heat and stir. Simmer cranberry mixture until the berries burst, about 5 to 6 minutes.
Place orange peels in a large glass container with an airtight lid, or large mason jars with lids. Pour vodka over the orange peels.
Allow the cranberry mixture to cool. Pour the cooled mixture into the glass container(s). Cover tightly and set aside for 1 week. After 1 week, strain out the cranberries sand orange peels and pour mixture into a clean bottle, using a funnel. Store vodka in the refrigerator.
Everything turns out all ruby red, and very festive for the holidays.
Tuesday, November 24, 2009
Domestic Witch's Home 'Crafted Holidays
If you haven't seen her button on the side of my blog, or even if you have, you should check out her blog. Her "Home 'Crafted Holidays" have begun!
Yours truly will be participating later on in the festivities. But there have been two great entries so far. How to make a pendulum. And how to make Infused Cooking Oils. Both very interesting!!!
Check it out, maybe you'll get some ideas. After all nothing says "I love you" to your friends and family like something handmade.
Friday, October 2, 2009
All about Lavender
The other day my mom bought me some Lavender dryer sachets from Trader Joe's. I never thought to put lavender in the dryer before. But man oh man does it make laundry a little easier to take.

Though I think next time, I'd just make my own. Take a muslin or organza bag, fill with lavender, knot tightly and voila! Your own lavender dryer sachet and it's refillable, cost effective and easy to do!
Speaking of lavender. This summer I found a site that talked about Lavender Wands
(These aren't my wands, but they look really similar to mine.)
So I ordered some lavender to be shipped. Of course after I made these, my mom found fresh lavender at Trader Joe's. Hmmm. It's starting to seem as though Mom is spending way to much time there. Oh well, saves me from having to look all over the store. ;) Anyway, they're really easy to do, make your house smell wonderful and if you keep a towel over your lap or work over a desk, you can save a bunch of buds and dry them out. So you get a wand, and plenty of lavender buds for your dryer sachets! Perfect!

Though I think next time, I'd just make my own. Take a muslin or organza bag, fill with lavender, knot tightly and voila! Your own lavender dryer sachet and it's refillable, cost effective and easy to do!
Speaking of lavender. This summer I found a site that talked about Lavender Wands
So I ordered some lavender to be shipped. Of course after I made these, my mom found fresh lavender at Trader Joe's. Hmmm. It's starting to seem as though Mom is spending way to much time there. Oh well, saves me from having to look all over the store. ;) Anyway, they're really easy to do, make your house smell wonderful and if you keep a towel over your lap or work over a desk, you can save a bunch of buds and dry them out. So you get a wand, and plenty of lavender buds for your dryer sachets! Perfect!
Subscribe to:
Posts (Atom)